We've finally made it to the third and final day of the Cappuccino Dress + Tunic sew-along! Today, we’ll wrap up everything and put the finishing touches on this project. It's really exciting to be so close to completion. Let’s dive in!
---
**Step 1: Prepare and Attach the Sleeves**
For **View B**, begin by sewing a basting stitch 5/8†from the bottom edge of the sleeve. This will act as your folding guide for creating the hem. Fold the fabric’s raw edge toward the wrong side, aligning it with the basting line, and press. Fold it again to enclose the raw edge completely, then press once more to form a narrow hem. You can leave it unfolded for now, but keep those creases intact—they'll help when you finish the hem later.
For **View A**, things get a bit different. Start by pinning the sleeves to the dress with the right sides facing each other, ensuring that the notches and edges match perfectly. Sew the sleeves onto the dress using a 1/2†seam, making sure to lockstitch or backstitch at both ends. Afterward, trim and finish the seam allowance according to your preference, pressing it towards the sleeve.
Here’s a quick visual reminder:

---
**Step 2: Sew the Side Seams**
Now it’s time to bring the front and back pieces of the dress/tunic together. Align the raw edges of the side seams and underarms, ensuring they match up neatly. Don’t forget to unfold the sleeve hem (if you're working on View B), and connect the side seams and sleeves in one continuous 1/2†seam.
Once you’ve stitched them, clip the seam allowance at the underarm curve—just take care not to cut through the stitches. Finally, press the seam allowances either open or toward the back, depending on what works best for your fabric. You can finish these edges with your favorite technique.
Take a moment to admire your progress—it’s starting to look like a real dress!
---
**Step 3: Attach the Sleeve Band (View A)**
If you’re working on **View A**, here’s how to attach the sleeve band. First, fold the sleeve band in half lengthwise with the right sides together and press a center crease. Next, sew a basting stitch 3/8†from the bottom, un-notched edge. Fold the fabric along the basting line to the wrong side and press.
Unfold the band’s edges and pin the short ends together with right sides facing each other. Stitch them with a 1/2†seam, backstitching at both ends. Open the seam allowance and press it flat.
Next, pin the long notched edges of the sleeve band to the sleeve’s raw edge, matching the notches and seams. Sew them in place with another 1/2†seam, reinforcing the ends with backstitching. Trim the seam allowance down to 1/4â€, and press the band and remaining seam allowances away from the sleeve. Repeat the process for the second sleeve.
To complete the sleeve band, fold it along the center crease and pin the folded edge over the previous stitching line, this time from the right side of the sleeve. Edgestitch the seam to secure it in place.
---
**Step 4: Hem the Dress/Tunic**
Finally, it’s time to hem your creation. Sew a basting stitch 5/8†from the garment’s bottom raw edge, which will serve as your fold line. Fold the raw edge to the wrong side, aligning it with the basting line, and press. Fold it again to enclose the raw edge completely and press once more. Edge-stitch the innermost fold to create a neat, narrow hem.
---
And there you have it! Your Cappuccino Dress or Tunic is officially finished. Congratulations on completing this journey—it’s always such a satisfying feeling to hold something you’ve made with your own hands. If you'd like, share pictures of your finished piece in the Liesl + Co Flickr group—we’d absolutely love to see what you’ve created.
Thank you so much for joining us for the sew-along. Happy sewing, and may your next project be just as enjoyable!
Watch Dial
How to customize the dial of your watch?
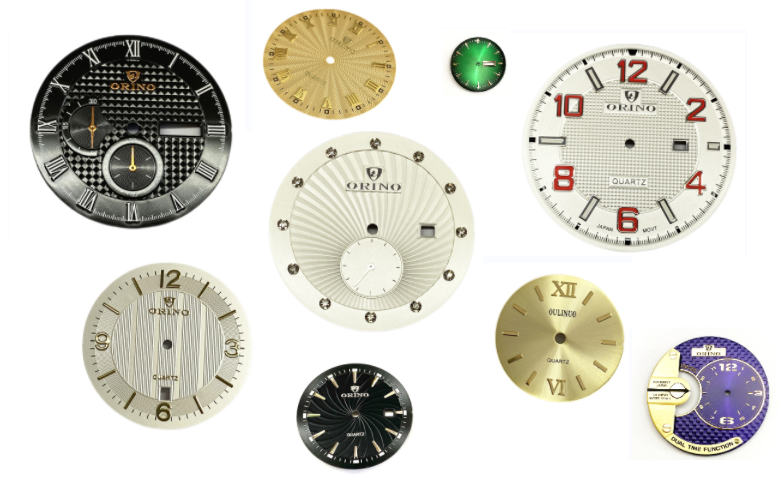
The watch dial is like the eyes of the watch, OEM ODM Watch Dial is an important part of any wrist watch and an integral part of the brand image. Customers submit custom watch dial drawings and we convert them to engineering design specifications for the manufacturing process. Watch dials work and complexity depends on the degree of design, watch movement function and finish required. Any material you want to customize the dial can be, and their process effects and production steps are different.For example, sunburst watch dials like sun ray refraction, magnificent mother of pearl dials, retro gemstone watch dials, waffle guilloche watch dials with a sense of technology, embossed pattern watch dials with strong three-dimensional effects, etc. brass watch dials are all possible.
This is why it is very good for people to choose to change the dial instead of the case. The cost of changing the dial is more favorable than re-ordering the watch, and the time is very fast. In this way, the watch has also changed a design to show its own charm.

Watch Dials,Custom Watch Dial,Seiko MOD Dial,SKX 007 Watch Dial,28.5mm Watch Dial
SHENZHEN ORINO WATCH CO.,LTD , https://www.orinowatch.com
